Laundry Room & Bathroom Reno in old house- Project #1

Homesteading & Country Living Forum

Help Support Homesteading & Country Living Forum:

This site may earn a commission from merchant affiliate links, including eBay, Amazon, and others.

zannej

Procrastinator
Neighbor
HCL Supporter
Joined
Feb 12, 2020
Messages
3,664
I have multiple projects going on all at once so I'm going to make a thread for each of them. They are not in chronological order, nor by order of importance.

The house I live in was built sometime in the 1930s or 40s (possibly even 20s). I'll save more exposition for another thread. We currently have 3 bathrooms but only one works. Two are ensuites that need major repairs/updates but the guest bathroom is the worst and the laundry room is terrible. To compound the problems, the previous owners did some terrible DIY mods and we had deadbeat tenants who did a lot of damage by tampering with electrical, plumbing, structure, and pretty much everything they could.

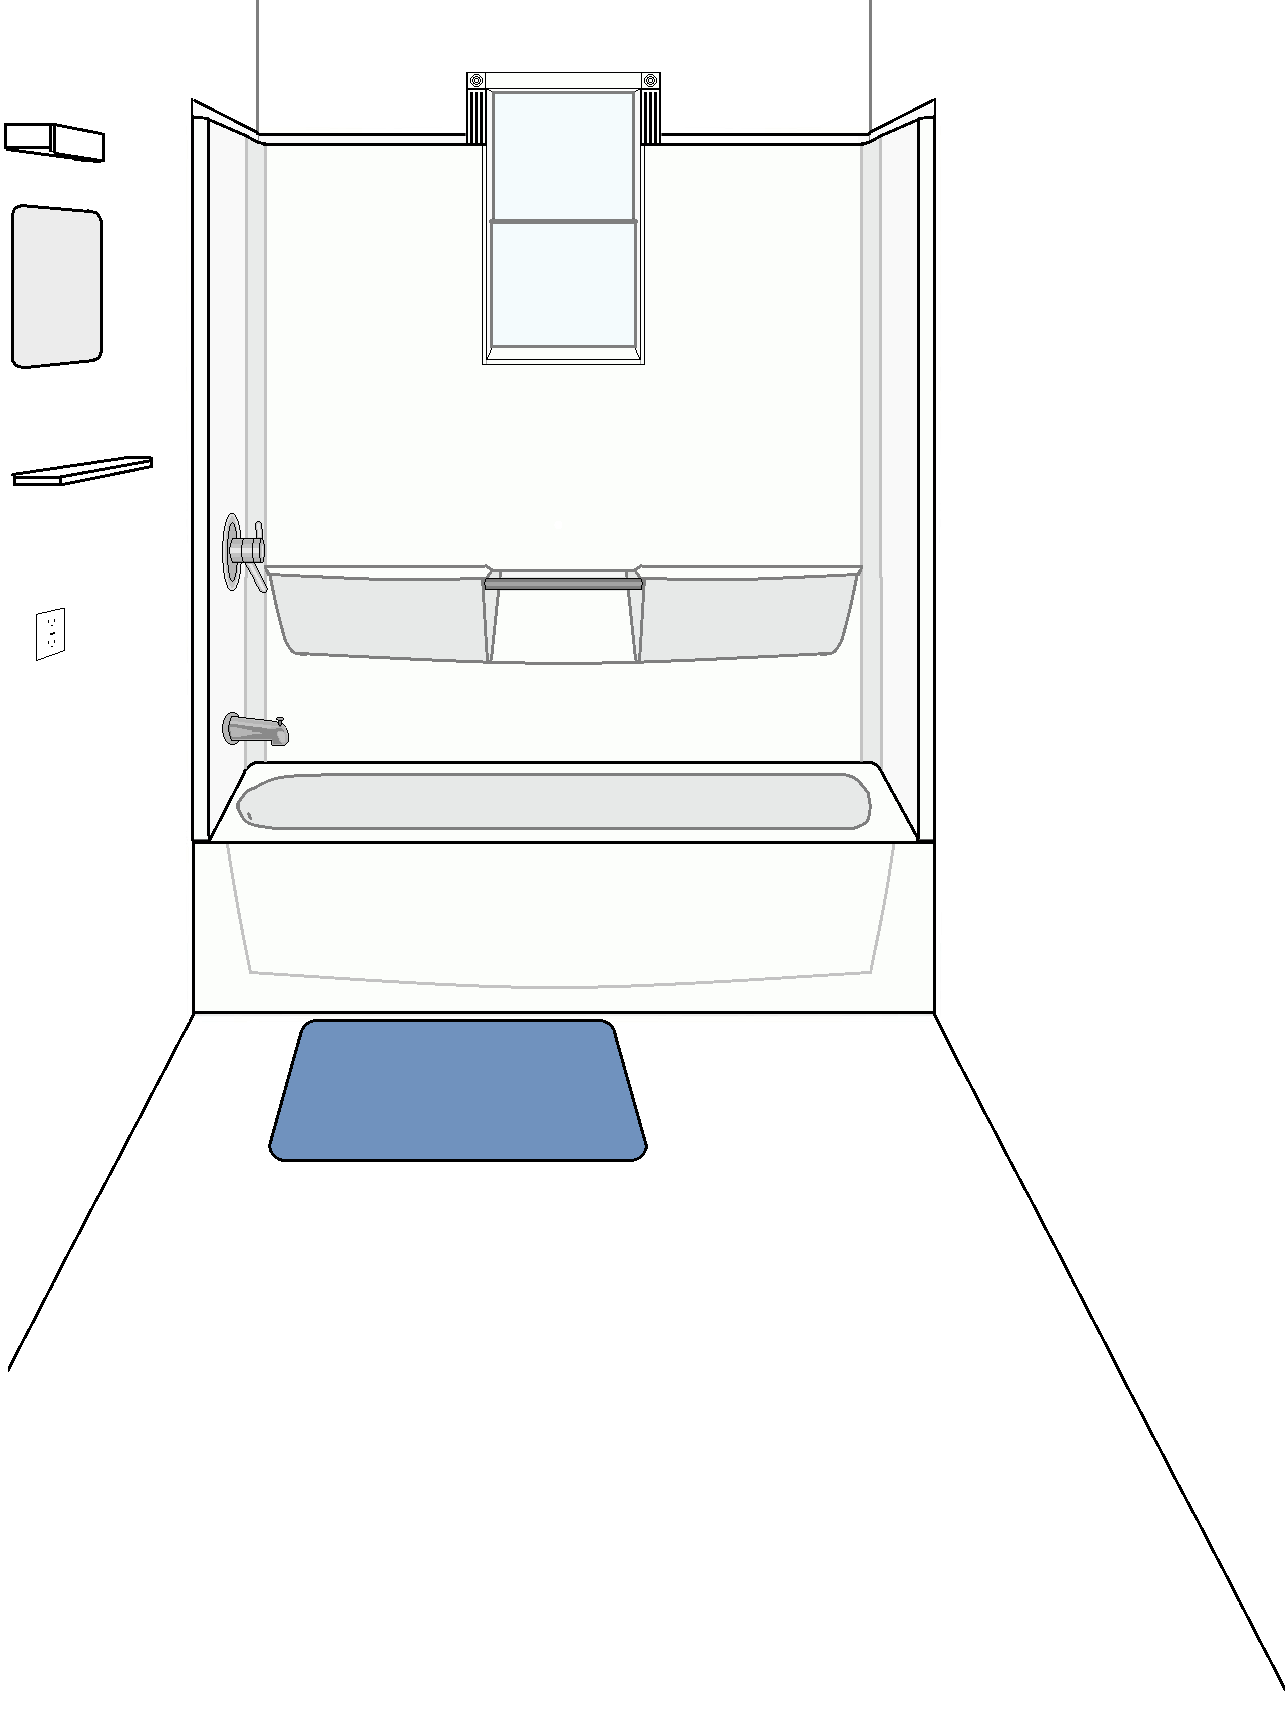
The guest bathroom had a wall-mount sink (which our former tenants managed to knock off the wall & break so we came back to broken drain pipes with no water in the S- trap). There's a small one-piece 30" shower and the toilet crammed in to a 23" alcove (for the record, minimum alcove size must be 30" to be to code with 15" from the center of the toilet to the nearest finished wall or fixture). We don't know if the previous owners did it or if the tenants did it, but someone mucked with the plumbing so that after the S-trapped lavatory pipe went down under the house, it branched with a black or green colored tee (looks green but could be something on it) that is NOT a sanitary tee and runs to merge with the drain from the shower. The shower does NOT have a P-trap or any trap at all. It goes straight down to the main soil pipe with a side inlet from the lav. I have to check, again, but I believe the connection is via sanitary tee on it's back instead of a wye. I suspect the tenants were the ones who screwed with the shower's plumbing because there was a horrible sewer gas smell when we came back that wasn't there when we left (we were stuck overseas for 9 years while the tenants nearly destroyed out house & property). We were constantly getting sick until put something over the shower drain and covered the broken trap from the lav-- it has a chrome-plated one-piece S-trap thing going on so it is harder to cut and cap than PVC.

The closet flange for the toilet drops down to a large sanitary tee where the side is reduced to what looks like 2" or 1-1/2". A Fernco fitting with no metal straps connects the tee's side outlet to the main vent which goes out through the roof. I believe it is roughly 13" or 14" west of the inside of the house's east wall. The bathroom door is about 24" wide, although we have taken the wall panels off on one of the sides of the room. It is currently stuffed with junk & old couch cushions. There is a heat-vent-light fan in the ceiling but it no longer works. The wiring going to the vanity light is pretty damn old and thick. The door to the bathroom is on the north of the room and to the west of the bathroom there is a hallway leading to the laundry room. The laundry room is south of the bathroom. There is an exterior door on the east side of the house north of the bathroom. The main circuit box is north of the exterior door & is perpendicular to it-- so parallel with the bathroom door. There is some electrical running from the box through the king studs & cripples for the door to a light above the door, and then going to a switch to the south.

The light was an exterior one that got knocked off in hurricane Rita & never got replaced. I've been told that the box for it was done incorrectly. We originally had a 78" steel door at the back, but it was gone when we came back & was replaced with a cheap 80" wood door but they cut in to the sill & trimmed the bottom of the door slightly to make it fit-- although it's all lopsided as what was supposed to be a header is sloped downward and is 1" lower on one side than the other (it slopes down to the north). There is no actual header for the door-- just a flat 2x4 spanning two uneven jack studs. Since it is an exterior door in a load-bearing wall, this needs to be rectified.

The laundry room is very tight and baskets have to be narrow to fit in while being carried. You can't walk through the room if the doors to the machines are open, and you can hit your butt on the wall while hitting your head on the machines when bending. We upgraded to Electrolux IQ touch washer & dryer with pedestals since our previous washer & dryer were in horrible condition. On the west side of the hallway there are two doors (one to a bedroom and the other to a small closet). There is a doorway (no door) with a curtain on the north wall going to the kitchen.

The floor in the entire area had been hardwood parquet (even in the bathroom- but hey, it was the one bathroom that didn't have carpet so that's a plus) but it was completely destroyed by the time we came back. I had to tear it all out so the flooring installer could put linoleum in. It was a nice neighbor who was a smalltime businessman who did the flooring & his helpers messed up on the laundry room. They used the wrong cut of the sheet and we ended up with a seam. There was a hole in the substrate almost all the way to the subfloor so the installer poured some white powder in it and added water to patch it, but it later broke apart when we were moving appliances around.

People in my family tend to be rather large so even if the bathroom wasn't so full of junk we can't get in, none of us can use the toilet because there is no room. No one likes having to stand up to wipe and my brother can't even move his arms if he sits on that toilet- his shoulders hit the walls. Speaking of walls, when we tore down some of the walls, we discovered the shower has no above-floor shutoffs. The cold water line is PVC and the hot water is CPVC (CPVC is fine, but PVC is no longer code approved-- I believe my state currently uses IPC 2012). I could not see where my washing machine drains to & I suspect it just dumps water under the house. Plumbing where I want to put the vanity is somewhat roughed in already for a laundry sink that never got put in, but the drain goes the opposite direction of the main line & I think it just goes to a french drain under the house.

I spent a lot of time on Houzz and other forums (like Houserepairtalk and plumbingforums & terrylove's forums) to get advice and plan. Shoutout to @Frodo for putting up with my incessant questions, drawing pictures for me, & teaching me most of what I now know about plumbing. I won't bore you with the previous iterations of my plans. Instead I'll try to get to the point and show the current layout and planned layout. We decided the best thing to swap the laundry room & bathroom so the laundry room is easier to access & the bathroom has more space than before.

I obviously will need to do better measurements when I get more walls down. My positioning of the exterior door is not quite right-- it's a couple inches north so there is more space between the door and the bathroom wall, but the current laundry room is slightly over 5' x slightly under 7'. It's enough to fit a tub against the exterior wall. The washing machine and dryer (which currently have their backs to the north wall of the laundry room) will be rotated 90° and placed with their backs to the east wall. I'll be leaving a little stub-out from the old north wall of the bathroom for electrical switches & outlets, & I'll put a shelf behind the washer and dryer to keep stuff from walling behind-- and might get the Haus Maus laundry guard or create my own version.

Apparently there is a 10,000 character limit to posts so part 2 of this post is going in the next post.
 
My To Do List for this reno:
Laundry Room
*Clean up brother's junk & clear out stuff that is cluttering hallway & bathroom
*Cut off & cap water supply for shower
*Finish demo of the walls & remove interior door for bathroom
*Replace rotted door sill & rotted wood under threshold
*Level floor, reinforce joists as necessary
*Replace jack studs with ones tall enough to support proper header- two 2x6s sandwiched together & installed just below the ceiling to avoid interfering with light
*Trim cripples to fit with new header
*Move electrical as necessary
*Install new steel clad exterior door (already purchased, pet door installed, & painted-- awaiting touch-up work)
*Install awning over exterior door (already purchased)
*Install new exterior light (already purchased)
*Put in new insulation in exterior walls
*Measure 5x & make templates for where washer & dryer will go & rough-in plumbing
*Install two 24"x30" cabinets on either side of window in laundry room & put shelf w/ closet rod in between.
*Create access panel for bathroom plumbing in south wall of new laundry room
*Replace old metal window w/ vinyl energy efficient window (in new laundry room)
*Build shelf behind washer & dryer & under window to keep things from falling behind machines
*Move & update electrical- need 4-prong dryer outlet & properly grounded 20amp outlet for washing machine
*Build hinged panel for accessing standpipe top & water supply for washing machine
*Remove vent-light/heater from new laundry room ceiling & replace with ceiling fan from old laundry room
*Extend ductwork & install vent-light/heat (already purchased) in ceiling of new bathroom
*Cut hole & install new duct for dryer & prep for MagVent (already purchased)
*Remove ceiling tiles, fill gaps between wood slats, paint, & add trim to hide seams
*Bump doorway for new bathroom over a few inches to allow for casing & prevent knob from hitting wall
*Install waterproof click-lock vinyl plank flooring (already purchased)
*Install new wall panels, paint wall panels that are staying, & install baseboards & cove molding
*Move washer & dryer in to room & hook them up

Bathroom:
*Level floor & reinforce for tub area
*Cut out holes for plumbing and rough it in (after measuring 5x and maybe making templates)
*Remove wall panels
*Replace old metal window with vinyl energy efficient window with tempered glass (will be custom order)
*Put up moisture barrier and insulation
*Attach direct drain to tub (P-trap is directly below the drain instead of the overflow- allowing for sufficient trap arm length)
*Install tub (ledgerboard for edge, shims for joists, backers in between for possible grab bar upgrade in future, roofing felt or landscape fabric under tub)
*Install wall panels (use access panel in laundry room to install shower valve--planning on Delta Multichoice R10000 plus Lahara dual thermostatic trim)
*Install showerhead above shower walls to avoid cutting a hole in the wallset & allow sufficient height for tall people (like my brother)
*Move/add electrical-- GFCI for near lav, 3 way wall switch for heat-vent-light & prep for light above vanity
*Install finished floor (either sheet vinyl or vinyl plank-- still deciding)
*Move existing in-wall medicine cabinet from north wall of old bathroom to north wall of new bathroom.
*Install & paint wall panels + add trim, molding, wainscoting (if needed)
*Install Toto Drake w/ Sanagloss CST744SG toilet (currently in master ensuite but being replaced by ADA height toilet) & upgrade to tower flush
*Install euro-style lavatory/vanity (already purchased)- will be bumped away from west wall about 3" & 3" or 4" from south wall (side for elbow room & back for water supply & drain)
*Put up vanity mirror (already purchased-- came with vanity)
*Install vanity light (already purchased)
*Install door to bathroom (already purchased but needs painting)

I hope I'm not forgetting anything. LOL.

I still need to decide on flooring for the bathroom as well as a plumbing layout. I know where I want the tub to go. I plan to alter the plumbing for my kitchen sink (currently S-trapped) to have it's plumbing go north to south to meet up with the main soil pipe closer because it currently runs east to west & merges with an octopus of plumbing from two bathroom groups. I plan to give the toilet it's own vent & run it up the exterior wall and around the eaves (which is how the circuit venting for the house is done currently). I'm debating whether or not to put the lavatory's drain out through the exterior wall & merge it with the vent for the toilet or if I should just slap an AAV on it & keep the plumbing inside.
 
using an aav is the way people are doing it these days. i personally do not like them and will not tell you to install it.
why you ask?
just look at the posts on the plumbing forum of people saying my hose stinks and i do not understand why.
inorder to let in air, it has to open, air goes both ways i have never seen an air check valve. have you?
it lets in air and a fart escapes.
all of a sudden the occupants are looking at each other, and the kid is yelling he who smelt it dealt it
 
My To Do List for this reno:
Laundry Room
*Clean up brother's junk & clear out stuff that is cluttering hallway & bathroom
I'm sorry, he has you trained. If he is an adult, he can do it. Not trying to be unkind, but I come from a family where so many did little or nothing. Your plate runneth over with things to do.
 
I'm sorry, he has you trained. If he is an adult, he can do it. Not trying to be unkind, but I come from a family where so many did little or nothing. Your plate runneth over with things to do.
When we were kids I was always forced to do his share of the chores. He was never made to do anything because he was the youngest and the only boy. He was my mother's favorite. He found that if he whined enough he'd get his way. I think there is a disconnect in his brain because he does not associate his refusal to do stuff with me having to be responsible for his stuff. If I don't clean it, it doesn't get cleaned. I can't physically make him do anything. I will most likely get help from my best friend (who *might* be able to get my brother to move a few things).

Frodo, good point. I've heard AAVs aren't ideal for septic tanks. I know there are also PAPAs but I'm not sure how to use one in conjunction with an AAV. Since I can run the drain out the wall and branch it to the toilet's vent, it shouldn't be too difficult. I don't like putting holes in the wall, but I will cut it so it will be snug & use caulk around it on both sides. Would 1-1/2" be sufficient for a vent for both toilet and sink after they merge? Any thoughts on the best way to connect the drain part to the main soil pipe or merge it with the toilet's drain?
Main soil pipe is a little over 5' north and runs perpendicular to the sink and toilet lines if I were to run them straight to it. My thoughts were to either run them both individually to it or run the sink's drain to the toilet's drain & connect in with a wye then run the merged line to the soil pipe & connect with a wye.

For the direct drain, I was looking at the distance of where the trap would be to the main vent and realized it would probably be too short but a direct drain will give me the length I need.

Some pictures:
Comparison of current layout to planned layout (ignore the small segment off to the right-- I have no idea why I didn't delete that)
B1newmeasurecomp3.png


Current layout
bathroomlaundrycurrenttop.png


Planned layout
bathlaundrycabstop2j.jpg


Sketch of rough plumbing path- Debating whether to have the kitchen sink drain go out the wall or to have the vent and then have two 45s below the vent to go down through the existing hole in the floor. Might be easier to just punch a hole in the wall for both. Right now it has an external circuit vent that goes around the window with two 90s and then terminates below the eaves (will need to add another couple 90s to get it up above the roof.
bathroomlaundrysketchnew1b.png
 
I am really disliking renovations at the moment. You have your hands full. I am truly happy that I spent the last few months cleaning out before these renos started. Gutting bathrooms and kitchens mean everything in them have to go someplace in the meantime. Then there's the new materials. Our front room looks like Lowes. Speaking of Lowes, I went there today (like I do at least 3 times a week) to get a bathtub hair trap for the new tubs. Granddaughters have very long hair. We need to dome traps. Out of stock. Also needed 10 ft of very small air hose for the jacuzzi tub. It's specialized, so I have to go to a jacuzzi store. Pain in the butt.
Make the man child clean up his junk in the hallway, or throw it all on his bed. Then renovate one room at a time. After decluttering. You'll sleep better.
 
When we were kids I was always forced to do his share of the chores. He was never made to do anything because he was the youngest and the only boy. He was my mother's favorite. He found that if he whined enough he'd get his way. I think there is a disconnect in his brain because he does not associate his refusal to do stuff with me having to be responsible for his stuff. If I don't clean it, it doesn't get cleaned. I can't physically make him do anything. I will most likely get help from my best friend (who *might* be able to get my brother to move a few things).
It sounds like my siblings and family. How is one person the only one who can do things, everything, while the rest sit, act helpless and criticize? I'm sorry. What it did for you and me was to make us know we are not helpless and can do many things. Look at all the things you can and have done. You can be proud of your knowledge, skills, and abilities.
 
Then renovate one room at a time.
This is how I have done it. One year, I worked on the bathroom. Painted, removed old flooring, new ceramic floor tile, replaced light fixtures, baseboards, new towel racks. I too make lists and keep whittling them down. I have gone through many rooms of my house this way, emptying them, starting with paint, removing and replacing things and putting it back together, step by step, piece by piece. Kitchen took me a couple years, with the refrigerator being in the dining room and no running water and no sink. I did dishes in two plastic bins for quite a while.

And, there are many things that are not hard to do, they just take some YouTube education, purchasing the right tools and materials and patience: Removing toilets and then putting them back. Replacing light fixtures. Ceramic tile floors. Counter tops.
 
Amish Heart, my house looks like a hoarder house combined with a crime scene-- like someone trashed the place. The cats love to knock stuff down and I have trouble bending & lifting so I haven't kept up with it & I have no idea what to do with stuff. I look at it and I freeze. I'm tempted to just shove his stuff out the back door, but then it will be in the way so I'll have to move it again. If I put stuff back in his room he'd retaliate by dumping dirty litterboxes on my bed (which he did once after I put a litterbox in his room when it needed to be cleaned bc he promised to clean it). If I can sweep something in to a dust pan and dump it in something, it's not so bad, but if I have to bend to pick stuff up, I get very winded. I have two prolapsed valves so when my heartrate goes up, I stop getting oxygen & get dizzy. My cardiologist passed away & I haven't found a good one since.
The weird thing is, when I'm at a friend's house, I can be more motivated to help clean than when in my own home bc when I look at my own home I don't know where to begin. My friend's fiance had been coming over to help for awhile, but she doesn't want to clean or do anything strenuous since she got pregnant. She seems to be afraid that she'll miscarry or die if she lifts a finger.
Youtube has been rather helpful but there's a lot of misinformation out there too. I once unintentionally prompted someone to take down his video by pointing out a plumbing code violation and cited the code. He was embarrassed & told me he was removing it due to his error. I told him he didn't need to take it down, but he could add a comment about it not being to code.

I seem to be better at planning than at execution & I've started procrastinating again. I still need to finish touching up the door that I'm prepping for this area & paint the door to the bathroom. I'm debating on whether to do the bathroom door in blue on the outside and white on the inside or white on both halves. I need to figure out what paints are safe to use on PVC pipe to protect some of the vent pipes outside. I know it can get brittle in the sun.

This is a view of the ceiling above the back door (no wall panel and insulation is falling out-- some of the ceiling tiles have already fallen). I forgot to note the attic access (no attached ladder) in the hallway but I didn't upload the pic that shows it.

laundryhallwayceiling4_May2018.jpg


This is what the hallway looked like before my brother threw trash bags in it and cluttered it up even more. Itsy is proudly perched on an old computer chassis that keeps the door from blowing open since it won't stay closed.
laundryhallwayitsy1_May2018.jpg


This is what the door sill looked like-- it's worse now. Rupert was looking around while I was trying to get pics.
myrottendoorsill1.jpg


This is from the inside-- you can see the floor dips to the left.
myrottedfloorneardoor.jpg


This was the back door awhile back-- the bottom has rotted more, it's overgrown with weeds, and the pet door completely fell out.
oldbackdoor.jpg


Down in the workshop, this is the door I'm preparing to replace the wood one. It was advertised as "solid core" but I later found out it was just "insulated core" which means it was thin steel sandwiching foam. Made installing the pet door a real pain. This was after a coat of primer-- but the either there was something wrong with the primer or the sprayer nozzle was borked. It did not spray well at all-- which is weird because the filler primer I used to fill in dings in the door sprayed out fine.
Doorprimed6.jpg


After some elbow grease, jigsaw, dremel tool, a drill, & mallet (which I named Mjolnir) I got the pet door on-- this is the outside part.
petdr-caulk1.jpg

This is the inside part. Since I couldn't use the screws to anchor to foam, I had to put in some #6 bolts along with some washers & nuts, then trim them with the Dremel tool metal cutting blade. I realize the pet door is possibly on backwards but it's staying this way. LOL.
petdr-caulk2.jpg

This was the door after the 1st coat of Behr Marquee exterior satin paint.
Doorpainted1.jpg

2nd coat looks better. I still have some touch-up to do & need to paint the frame and trim, but I might do that once its in place.
dr2ndcoatinner2.jpg
 
The vents outside the wall will be like the existing circuit vents (I'm assuming that is what they are because they don't attach until after the pipe goes through the floor).
outsideventpipe.png


I completely forget to mention that I want to add a folding table that flips down when not in use. There are brackets for it on Amazon.

I also want to have hidden storage behind the washing machine to make sure nothing falls through-- sort of like what you can see in one of the pictures on Ana White's laundry room page.

For finishes I want to use this Delta Lahara shower trim with this Delta Multichoice valve (it should be compatible but I'm waiting to hear back from the mfr).
I want to get a Watco 595 direct drain kit with the strainer. I'm waiting to hear back from Watco on whether or not I can get just the strainer.

I also forgot that I need to replace the back steps. People who did the roof and siding broke the steps that were there & didn't replace them so we have cinderblocks piled up and they aren't steady.

Also, I have a more updated photo of the 2nd coat of paint on the door-- I have since scraped it but I will probably put a magnetic whiteboard over the damage if it still shows through.
dr2ndcoatinner.jpg


I was looking at my list of what I needed to do for the door part on another forum & thread. I'm happy to see that I knocked off the first 3 things on the list. It's not much, but it's progress.
 
Last edited:
Nice door! I still would start with a clean out. Order a dumpster from the garbage company. Fill it up. A cluttered floor inside a house is a tripping hazard, and would not be good for you and your mom. I like to take one room at a time, too. Probably why it's driven me nuts that the work guys here gutted 3 bathrooms and a kitchen the same day. But our place needs repainting and small jobs now. So I'm back to taking one room at a time.
 
When we were kids I was always forced to do his share of the chores. He was never made to do anything because he was the youngest and the only boy. He was my mother's favorite. He found that if he whined enough he'd get his way. I think there is a disconnect in his brain because he does not associate his refusal to do stuff with me having to be responsible for his stuff. If I don't clean it, it doesn't get cleaned. I can't physically make him do anything. I will most likely get help from my best friend (who *might* be able to get my brother to move a few things).

Frodo, good point. I've heard AAVs aren't ideal for septic tanks. I know there are also PAPAs but I'm not sure how to use one in conjunction with an AAV. Since I can run the drain out the wall and branch it to the toilet's vent, it shouldn't be too difficult. I don't like putting holes in the wall, but I will cut it so it will be snug & use caulk around it on both sides. Would 1-1/2" be sufficient for a vent for both toilet and sink after they merge? Any thoughts on the best way to connect the drain part to the main soil pipe or merge it with the toilet's drain?
Main soil pipe is a little over 5' north and runs perpendicular to the sink and toilet lines if I were to run them straight to it. My thoughts were to either run them both individually to it or run the sink's drain to the toilet's drain & connect in with a wye then run the merged line to the soil pipe & connect with a wye.

For the direct drain, I was looking at the distance of where the trap would be to the main vent and realized it would probably be too short but a direct drain will give me the length I need.

Some pictures:
Comparison of current layout to planned layout (ignore the small segment off to the right-- I have no idea why I didn't delete that)
View attachment 35803

Current layout
View attachment 35804

Planned layout
View attachment 35805

Sketch of rough plumbing path- Debating whether to have the kitchen sink drain go out the wall or to have the vent and then have two 45s below the vent to go down through the existing hole in the floor. Might be easier to just punch a hole in the wall for both. Right now it has an external circuit vent that goes around the window with two 90s and then terminates below the eaves (will need to add another couple 90s to get it up above the roof.
View attachment 35806
because of a thing called suds relief, you need te washer and the kitchen sink to drain down stream of that tub. if not. bubbles will bubble up into the tub.

also. you can get by with 1 vent for the bathroom if you use a 3'' san tee with a side outlet
 

Attachments

  • zanney.png
    zanney.png
    29.9 KB · Views: 6
  • zinke range bag.png
    zinke range bag.png
    7.5 KB · Views: 35
...be responsible for his stuff. If I don't clean it, it doesn't get cleaned. I can't physically make him do anything. ...

...Would 1-1/2" be sufficient for a vent for both toilet and sink after they merge?

I had a brother-in-law who was the same way. He'd whine and the family would cave. His childness didn't work on me. He had planned on moving in with us expecting my wife to wait on him hand and foot. When he learned what my requirements would be he decided not to move in. :)

IMHO (and respectfully) you do have the authority to make him clean up after himself, your house your rules. If he doesn't follow your rules then evict him.

I thick 1 1/2" is too small for a main vent. I'd suggest checking with your local building inspector to see what they require.
 
Last edited:
Thanks, AmishHeart. I really like the color. I was looking at the paint cards and picked that one figuring my mother would like it. I grabbed several but that was her favorite.
because of a thing called suds relief, you need te washer and the kitchen sink to drain down stream of that tub. if not. bubbles will bubble up into the tub.

also. you can get by with 1 vent for the bathroom if you use a 3'' san tee with a side outlet
So, I should tie my tub's drain in with the toilet's drain and run it back to the main soil pipe? Or was that a vent? There is a vent right behind the tub- it goes out through the roof. I forgot that sanitary tees can have side outlets. I would like to tie in to the existing vent since it is already there-- at least for the washing machine and tub-- shorter run of pipe. Lav & toilet can use the same vent though.
How does this look?
bathroomlaundrysketchnew1c.png

I just remembered that the soil pipe is not quite under the wall because it is in line with the toilet's drain-- so it's 12" from the wall while the vent is inside the wall.

The Lazy-L, Good thing he didn't move in & try to break the rules. That is something my brother would do (and did do when he moved near my sister). It's not my house so it's not my rules. We both live with our mother, but I'm her caregiver. She's still able to function mentally to make her own decisions, but she has mobility issues and diabetes so she needs my help (plus she likes to be waited on hand and foot).
 
I had a brother-in-law who was the same way. He'd whine and the family would cave. His childness didn't work on me. He had planned on moving in with us expecting my wife to wait on him hand and foot. When he learned what my requirements would be he decided not to move in. :)

IMHO (and respectfully) you do have the authority to make him clean up after himself, your house your rules. If he doesn't follow your rules then evict him.

I thick 1 1/2" is too small for a main vent. I'd suggest checking with your local building inspector to see what they require.


2'' minimum on that terlet because it is a wet vent

I told zanny 3 years ago to toss his dirty dishes and trash into his bedroom
put her foot. she is a softy.
ME? aint no way in hell would i put up with that crap.
that boy would be bounced out the house so quick he would think he was dorothy in the wizard of oz
 
Thanks, AmishHeart. I really like the color. I was looking at the paint cards and picked that one figuring my mother would like it. I grabbed several but that was her favorite.

So, I should tie my tub's drain in with the toilet's drain and run it back to the main soil pipe? Or was that a vent? There is a vent right behind the tub- it goes out through the roof. I forgot that sanitary tees can have side outlets. I would like to tie in to the existing vent since it is already there-- at least for the washing machine and tub-- shorter run of pipe. Lav & toilet can use the same vent though.
How does this look?View attachment 35829
I just remembered that the soil pipe is not quite under the wall because it is in line with the toilet's drain-- so it's 12" from the wall while the vent is inside the wall.

The Lazy-L, Good thing he didn't move in & try to break the rules. That is something my brother would do (and did do when he moved near my sister). It's not my house so it's not my rules. We both live with our mother, but I'm her caregiver. She's still able to function mentally to make her own decisions, but she has mobility issues and diabetes so she needs my help (plus she likes to be waited on hand and foot).
YES. use a side outlet
tie the washer in after or down stream from the bathroom tie in. to avoid suds

zanny2.png
hillbilly3.png
 
Thanks, Frodo! <3
LOL @ the picture below. If I run the sink's line to merge with the toilet's line (downstream of the toilet) it wouldn't be a wet vent anymore right? (I'd still like to do a 2" vent at the least). Or would it be simpler to run the lav's drain along the outside of the wall & merge it with the toilet's vent with the side outlet tee? (A part of me is worried the cows will somehow kick it-- they already crapped on the outside wall back there. My red cow rubbed her ugly butt on the siding, but she scares off trespassers & I have a pressure washer somewhere...
From the lines, I see you're suggesting that I tie the washer in downstream of the toilet as well? And here I wanted the suds to clean my toilet. :p But I get the reasoning on it.
More pics:
Vanity that will be installed-- currently sitting in derelict shower collecting dust
20140130_210614.jpg

Toilet from Mom's bathroom that will be moved to guest bathroom-- Toto Drake w/ Sanagloss. Please excuse the mess on the floor, I need to clean that. LOL.
Totodraketoiletmoms.jpg


Ceiling fan-- think it's Evergo brand & we got it from Mongomer Wards-- tenants for some reason flipped the blade holders upsidedown. Mofo needs to be cleaned badly. Looking at it... I think the whole fan kit might be on upsidedown...
20140130_211127.jpg

Early sketch of the planned layout from 1st person (I suck at perspective on the tubs). Will be using a different mirror & put that mirror on the opposite wall & have a shaving area over a trash can so there won't be hair in the sink- vanity light will also only have 2 lights (we got one on clearance).
bathroomplanfancy1.png

Plumbing parts for the toilet-- might go w/ 4" instead of 3" depending on what is available. But 3" will probably suffice. Will have to change the tee to a side outlet one for the lav drain.
I still need a branch vent for the lav since it's 1-1/2" (staring out at 1-1/4") & the run will be greater than 3' I think-- or maybe it won't now that I think about it if I angle it correctly I can run it at a 45° angle, slap a 45 on it to go out the wall, then have a long sweep 90-- one of them could be a street bend to make them fit together without something in between. Toilet should only be about 17" away... Not sure if that would have it at the right slope for the trap arm though....
 

Attachments

  • Toiletplumbingidea1.png
    Toiletplumbingidea1.png
    77.6 KB · Views: 6
Trying to get myself motivated to do something and can't sleep bc of my sore throat. Need to find some throat spray and/or drops.

In my sketches I've had the shelf behind the washing machine open, but I like what Ana White did in her laundry room.
anawhitelaundryhiddenstorage.jpg

So, I'm thinking I could do a hybrid. I could have a partitioned space & a door to conceal the water supply & standpipe top (which could prevent stuff from falling through) and then have open shelving the rest of the way. I've got front-loaders so they won't have the controls sticking up at the back.
 
Got the tub and walls ordered. Tub is actually in stock at Lake Charles Lowes. Was supposed to be in stock at Alexandria one but they couldn't find it so they canceled the order. Employee said because the item showed as being in stock, they couldn't request to have one shipped in (or at least, she didn't know how). She gave me phone # for LC store & the item number. Their computers showed 2 in stock initially. Employee in plumbing said the system showed 1 and he laid eyes on it and told me where it was before I re-ordered to pick it up from that store. Might do it tomorrow or Wednesday. Mom has an appointment in Alexandria Tuesday.
The tub/shower I got is the Sterling Performa. It's a smaller tub than I'd wanted (not as wide) but that gives more room for the toilet. Tub is 29"x60" so shower is 30"x60". I had to get one that would work with a window trim kit. They want $180 to $190+ for the Sterling brand window kit. It's only 30" high. *** that. Found a Mustee one for $58 that is 36"x36"x8. It is pre-cut to have the side panels overlap to line up with the bottom lip. I plan to find a way to slope the sill to make water drain away from the window & in to the tub. Got the kit ordered. Just need to get the new window ordered (custom order since it will have tempered glass). The window will extend above the surround so I will put some polyurethane bullseye plinths, fluted side molding, and a top piece.
windowtrimdeco1.png

I'm trying to decide what to put up as wall panel above the shower. Old wall paneling has to come down- it's in bad shape & will not tolerate a wet location. Any suggestions?
 
Got the tub and walls ordered. Tub is actually in stock at Lake Charles Lowes. Was supposed to be in stock at Alexandria one but they couldn't find it so they canceled the order. Employee said because the item showed as being in stock, they couldn't request to have one shipped in (or at least, she didn't know how). She gave me phone # for LC store & the item number. Their computers showed 2 in stock initially. Employee in plumbing said the system showed 1 and he laid eyes on it and told me where it was before I re-ordered to pick it up from that store. Might do it tomorrow or Wednesday. Mom has an appointment in Alexandria Tuesday.
The tub/shower I got is the Sterling Performa. It's a smaller tub than I'd wanted (not as wide) but that gives more room for the toilet. Tub is 29"x60" so shower is 30"x60". I had to get one that would work with a window trim kit. They want $180 to $190+ for the Sterling brand window kit. It's only 30" high. *** that. Found a Mustee one for $58 that is 36"x36"x8. It is pre-cut to have the side panels overlap to line up with the bottom lip. I plan to find a way to slope the sill to make water drain away from the window & in to the tub. Got the kit ordered. Just need to get the new window ordered (custom order since it will have tempered glass). The window will extend above the surround so I will put some polyurethane bullseye plinths, fluted side molding, and a top piece.
View attachment 43434
I'm trying to decide what to put up as wall panel above the shower. Old wall paneling has to come down- it's in bad shape & will not tolerate a wet location. Any suggestions?

Zanne its really coming along nicely.
 
@Frodo, Oh yeah. I forgot other homes use sheetrock. There's only one piece of sheetrock in my entire house & it's behind the water heater. My whole house is covered in wood paneling. I was thinking of using some sort of plastic/waterproof wall panel that is thinner for the top part, but I'll see which turns out to be cheaper. My plan was to have waterproof trim along the top & sides of the shower to frame it out & go with the wood paneling (because I have a bunch of panels we pulled out of the pantry). If greenboard is cheaper, I might go with it though. I know my best friend has experience putting that sort of stuff up.
Got the tub home & in the workshop. Needed to get my friend back home so I haven't opened it yet to check for cracks or damage. He said the box looked untouched so it should be fine, but tomorrow I'm going to go open it up and take a look.
 
Got the wall set in & checked it for damage. Looks good. Stored it in the workshop for now. Got the window trim kit as well. Still waiting on some other trim to arrive.
Still need to buy the pex supply lines & fittings, the pvc drain fittings, & the tub overflow & drain kit.
 
Since I found out that tub spouts need copper & the only plumber that will come out to my place doesn't sweat copper, I decided to get a copper elbow with push-fit end on top. It is long enough for the tub spout. I got another piece of copper pipe and a push-fit to female threaded to go on the bottom of the valve. I got a bracket that spans the joists & has a hole for the pipe that will hold it steady so it won't pivot.

I've decided that instead of a medicine cabinet in the exterior wall, I will use the mirror that came with the vanity. It has a built-in shelf (although one of the bullseye rosettes split/cracked when I was attaching it). I'll have to fix the crack. I think that's probably why the set was discontinued. The medicine cabinet from the old bathroom will instead go on the opposite wall over a trash bin. I'll have shelves below and above the cabinet. The top one will have an undermount LED light. The bottom one will have a hole for power cords & there will be a GFCI outlet below it to plug in razors. It will also have a rod for hanging a hand towel. Most of my brother's shaving utensils should be able to fit in the medicine cabinet. His electric razor can sit on the shelf.

Since I want to bump the vanity out from the wall about 3", I want a spacer pull-out shelf thingy. I was looking at this blog post on how it was made & the blogger linked the slides she used. I believe they are supposed to be side mount but she used them as top & bottom mount. Not sure if they are as strong that way. I found a similar pair from Rockler that has the same features. I'm trying to find them on Amazon so I can ask if they can be used the way the blogger used them. I want full extension ones with at least 100lb rating that can be used under & top mount. I decided not to go with a pre-made Rev-A-Shelf unit bc they are not the right size & I want something custom.

I updated my sketch to reflect the changes (and I tried to fix the perspective on the tub). I updated with the new mirror, changed the vanity light to reflect the light we bought. I also drew a sketch of the opposite side of the room. I want to get one of those switches with 3 rockers on it. Over twenty years of using MSPaint and this is all I can do with it. LOL.
guestbathroomplanfancy1.png


I finally made a tub spout that doesn't look like a duck bill!!! I copied the showerhead and controls from another drawing I did. Delta Lahara handle with two levers. One for temperature and the other for pressure. I was lazy & had a crappy unfinished showerhead. It will have a handheld so I may try to draw something better later. I left out the shower curtain rod bc I wasn't sure how to draw it. I plan on doing another drawing from the side view to show the tub and shower. For the walls above the tub I'm thinking of getting something called "waterboard". It's a purple waterproof sheetrock like material. My friend used it in his bathroom. I'm debating on wall color. For my drawings I did pale blue but that was just to make the drawings look a little better.
 
Working on a sketch of the shower/tub view. I used the stock photo of the tub/shower unit as reference & used the line tool to measure to get it as accurately as I could.
Not happy with the shelf & medicine cabinet drawings. Still working on drawing other stuff. Need to decide on a showerhead. Trying to figure out how to draw the double curved shower rod. I can't decide if the perspective would show it from below (thus it would curve up) or above (curving down). But this is my work in progress (WIP).
2855209017b726c71f527d28b0e8317d197af75f.png
 
Haven't uploaded yet, but since did some revisions. Found out the window won't go that much higher than the wallset (wallset flange is at 76.5" high and top of window is around 81"). I also realized there is an indent on the side walls that complements the ledge on the back wall. It's about 19.25" high & would interfere with the 7.5" diameter shower trim lever. The location is such that I will have to put the trim either above or below the indent. Center of valve would be around 2.75" above or below the indent. I'm leaning toward above since we don't plan on using the tub (but are keeping it to hold water during storms & to maybe rinse stuff-- mostly keeping it to maintain property value as house had 2 full baths before & since we took away a tub in one room, we're adding one in another).

The tub has a 15" apron with 1.25" flange.

The Multichoice valve specs recommend a distance of 8" to 18" from center of valve to center of tub spout. I tried to find standard tub spout heights & 4" above tub rim was suggested. If I do the 4" above, the trim would have to be at least 19" higher to be above the indent. So a couple of questions:
  1. Is the 4" tub spout height describing the bottom of the tub spout or center of the tub spout?
  2. Would there be any problem with raising the tub spout to 5", 5.5", or even 6" above tub rim?
  3. Would there be any problem with having the distance of the spout & valve centers be greater than 18"?
  4. Would having the spout too high create too much splashing when tub is first being filled?
 
So, I think I'll do the tub spout about 6" or 5" up to make it easier to reach for taller people.
I've been trying to decide on a tp holder & they are so expensive. After seeing some wooden recessed ones, I'm leaning toward making my own tp holder out of materials in the workshop- maybe re-purposing a metal recessed one we have in the old bathroom (if it can fit mega rolls) & I can make some trim around it and add a little shelf over it -- to keep water from the sink off of the paper and to have a place where wet wipes and phones can be set. I'd have to cut into the side of the vanity as I don't think there is room between the toilet & the vanity on the wall & it would be a pain to reach backward like that. Recessed with a small shelf would give more elbow room.
For showerheads I was thinking of the KES one but I'm worried it might break & don't want to have to drill an extra hole for the slidebar end. My very first thought was to get a Moen Attract Magnetix showerhead. Then I started thinking about a Delta Intuition 2-in-1. There are numerous different sizes & styles. I don't like how they have gray plastic to attach at the shower arm though. Then I saw a Moen Engage 2.5gpm showerhead. It's more expensive, but I think it would be worth it in the long run. It also happens to look better, but the flow rate is what appealed to me the most. Plus it has a magnetic attachment to make it easier to dock and undock the handheld.
MoenEngageMagnetix2.5_2.jpg


I've read that people have trouble with this unit if they have a shorter shower arm. 8" seems to be a good minimum length. I'm thinking about getting this one:
KeeneyPlumbPakpp825-191S_1.jpg
 
Last edited:
Thanks, @JerryNPavon. It looks even nicer in person. It just arrived. I've decided I want to put it in my ensuite instead. I might get that same shower arm & a different showerhead for this bathroom. Sticking with Moen & will get the handheld only Moen Engage with the 5.5" handheld. It's not as pretty, but it's got good ratings & my brother said he's more interested in using a handheld showerhead than having a stationary one.
MoenEngage26112.jpg

I don't like the gray plastic look, but my brother likes the look of plastic so he's fine with it.

I'm slowly working on my side sketch but am not happy with how some of the stuff covers the shower I drew. Trying to figure out the right shape & angles for the vanity but am not happy with it. You can see my work in progress with my attempts at drawing the sink.
guestbathsideviewWIP3b.png

I had good reference pics for the toilet & shower but not for the vanity. I need to round off the edges- they are curved but for now I'm getting basic block shaping.

I got MUSTEE Duratrim for the window trim. It's thermoplastic. It comes in 3 parts (sill and 2 sides). It is shaped like an L so it has an overhang on to the shower surround. For the sill piece I intend to attempt a 90° bend at the corners. Instead of cutting it off, I'll take about 2" on one side and 10" on the other (it's a 36" piece). I'll cut the overhang, score the back lightly, get it laid flat (finished side down) on a table or surface with a somewhat sharp edge/bend to it. Then I will use a blow dryer to heat it and gently bend it in the corners so I can overlap it with the sides instead of having a cut there.
 
Last edited:
I was cataloging all of the fixtures and fittings and such we're using in the guest bathroom and decided to go check the vanity lamp and realized it has 3 bulbs instead of two. We got it on clearance for about $20 from Lowes. https://www.lowes.com/pd/Portfolio-3-Light-Chrome-Modern-Contemporary-Vanity-Light/1000002924

More images I think are available on e-bay listings. Portfolio 3-Light Chrome Modern/Contemporary Vanity Light for sale online

I made a sketch of it for my drawings:
1608530363314-png.55386


Plugged in to the sketch (still need to update the faucet but haven't felt like it).
bathroomplanfancy2a2b.png
 

Latest posts

Back
Top