The Lost And Impressive Art Of Net Crafting

Homesteading & Country Living Forum

Help Support Homesteading & Country Living Forum:

This site may earn a commission from merchant affiliate links, including eBay, Amazon, and others.

Sentry18

Thrivalist
Neighbor
HCL Supporter
Joined
Nov 26, 2017
Messages
19,105
Location
US of A
And one we may need again someday.


https://prepperswill.com/the-lost-and-impressive-art-of-net-crafting/

The Lost And Impressive Art Of Net Crafting
September 13, 2019 by Dan Mowinski

Sewing web into a workable fishing net or trap by hand remains a dying art practiced by a few American Indians, commercial fishermen, and hobbyists in our Western culture. Very few books instruct the subject of net crafting in detail, and there’s only a couple of accredited schools that currently teach the net crafting. This is truly a skill which normally requires two years at sea with hands-on experience to learn.

Once you learn this knowledge, it’s possible to construct various types of fishnets and traps, live-game snares, camouflage canopies, garden fencing, and even the base frame for an emergency shelter roof.

The family survival potential of thousands-of-year-old art of net crafting would be an asset to outdoor relating people. From the foraging for food aspect, the net provides a reliable and silent means to put food on the table by catching game regardless of natural feeding modes.

The skillful use of this tool in its varying forms along an active game trail, or in a well-sited fishery will produce results even without the hunter’s presence. However, this information fulfills a survival education purpose. There are state fish and game laws to consider, and it’s definitely inhumane to needlessly leave an ensnared animal to die because of failure to check a trap.

Fishnets include gill, seine, cast, and landing nets, crab and shrimp pots, and turtle traps. Each tool functions with a specific purpose. Please also note that all of these foraging tools can be purchased commercially, and I highly recommend buying a commercial one before trying to craft it yourself. Also, Fisherman’s Knots and Nets, by Raoul Graumont is one of the few books available on this subject.

The basic rules of net crafting
The basic rules of net crafting are universal. Like any trade there are tools to use properly, knots and the various components of the net to learn, plus serious disciplines to follow.

This situation applies to both new web fabrication and torn net repair. It’s also impossible to do more than explain the few basic steps of the art in this article. Nevertheless, let’s begin with the simple tools of the net maker’s trade.

The sailor’s shuttle or needle is simply designed to hold a complement of sewing twine, this depending upon the tool size and twine diameter required for the job. Bonded nylon twine offers the best net crafting material. It, importantly, prevents knot slippage.

The material is available in many sizes. For instance, cast nets are made from #5-42 lb. test line, landing nets use #9 or #12, and turtle traps require strong #18 twine.

An example of a simple 4 ½ -foot radius bait-cast net requires ¾” square mesh and a ¼ lb. of twine. The simple rule here is to utilize the line with strength enough for a specific purpose.

The problems involved with sewing web are interrelated whether you manufacture a new net, or repair torn webbing, and the mathematical condition of net paneling can best be understood as meshes wide and meshes deep. This means a square mesh measurement.

Suggested article: Harvesting Marine Life In Tidal Areas

However, net panels can also be oblong, tapered and hooped in shape. For simplicity of purpose and a beginning look at net crafting we will only work with square web repair and sewing new netting.

When discussing the how-to and hands-on learning part of this subject, it’s important to know the terminology of a net’s webbing. In fact the whole fabric of the net is called web, but each diamond section is termed a mesh.

Each mesh has four bars and interlinks with its neighbor with tightly sewn knots. The basic mesh knot fulfills the only stitch necessary to sew a body of new webbing. However, there’s also sider and pick-up knots involved in repair work. The important thing to remember is to cinch those knots tightly because a sloppy net won’t fish properly.

When you handle a wad of netting it appears to be a maze of interlocking twine, seemingly without beginning or end, and definitely tangle prone. However, each part of the net has a purpose, and because the average beginning net fisherman usually starts with a commercially made net we will first deal with simple web repair problems.

Repair work in net crafting
Repairing a nasty tear in the middle of a gill net can be a confusing situation, especially if you’re green at the trade. Therefore, these five golden rules are extremely important to memorize.

  • First: Always start and end sewing on a three-bar, a torn section where three individual bars meet in a perpendicular configuration.
  • Second: Never sew on any other connected bar in the hole.
  • Third: In order to avoid rule two always cut the second bar down.
  • Fourth: After tying a sider knot is there a pickup? Never sew on any other connected bar in the hole.
  • Fifth: After a pickup you must sew up to the mesh above.
These rules will help prevent you from getting lost or making a mistake while solving a net problem.

Now, before tackling any web repair situation, it’s best to hang the net, so the meshes lay straight, and the hole can be easily worked on. If this is done correctly the knots will align and webbing open and close in a lengthwise manner.

In net crafting, it’s crucial to not start sewing crooked or cross mesh. To prevent this, it’s important to tie the net to a pole or hang every other mesh on a nail so the repair section can be pulled toward your body. Then the proper way to start sewing is to grasp the shuttle with the right hand and handle the webbing with the left hand. This rule of thumb remains absolute regardless of whether you’re right or left-handed. In addition, use the left thumb and index finger to hold each mesh tip firmly when securing a knot down to the net-ting.

Utilize the left small finger to size and hold each loop of the new mesh being sewn. Finally, knots should be fashioned, so the mesh halves line up evenly when stretched. These disciplines result in tightly cinched knots that won’t slip and help the learning craftsman perform in a fast and efficient manner.

Basically the net body forms by sewing meshes in a left-to-right then right-to-left action with the shuttle. In other words, when you sew left-to-right pierce the mesh from behind, under and through. However, the return right-to-left procedure involves an overhand down and through motion. The end result is netting which hangs smoothly without a twist.

With these considerations in mind we are ready to repair a simple three-bar, eider, pick-up, then mesh and terminal three-bar rip.

First it’s important to clean the torn mesh ends from each knot with a knife

Second, tie a single hitch in the twine end and place this snugly behind the crotch of the upper, beginning three-bar.

Third, bring the shuttle behind and around two of the three bars and then through the resulting loop in the twine. Finally, repeat this procedure and cinch the resulting double-hitch down tightly, it shouldn’t slip.

Next grab some shuttle twine with the small left-hand finger and place it over the top of the eider, while adjusting the new bar to desired size. Bring the shuttle around and out of the Sider mesh, then snug the resulting loop up against the lower side of the old knot.

Now thread the shuttle around both the eider and newly sewn bar and back down through the twine loop. The resulting side knot should hug both the top and bottom of the old knot securely.

Now, supposing the sider just tied had been a three-bar; to sew into it would result in the end of our repair operation before finishing the rip. Thus we utilize golden-rule three and cut the second-bar down, and because there’s a pick-up mesh situation it’s clearly visible that rules four and five apply.

Always sew a pick-up by threading the shuttle from behind and up through the mesh, again as necessary grasping the mesh tip with left thumb and index finger. Sew the shuttle completely around two bars of the pick-up and up through the twine loop; then cinch it tightly.

After a pick-up you must sew upward, from behind and through the mesh above. Remember to size each mesh neatly. If you’re sewing with me it’s interesting to note that I use the left-to-right stitch motion.

Tying a mesh knot is much the same as the pick-up, and from this point the problem should end by tying into the terminal three-ban If not then it’s time to go back through the rip and locate the mistake, which might show up as an octagonal five-bar mesh.

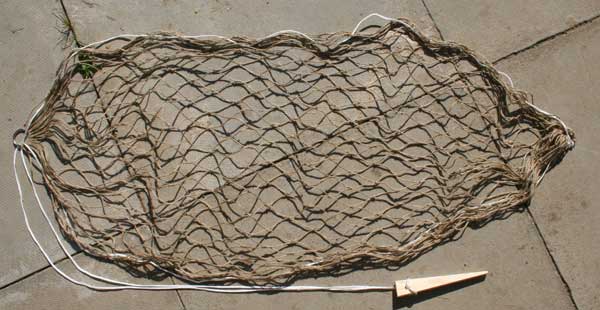
Basically the square measure net I’ve described here would probably be a gill or seine net, and of course cast and landing nets feature a circular web pattern.

The important thing to remember is that the repair techniques described here apply to all nets. For the average fisherman this beginning knowledge provides the necessary resource to keep that valued foraging tool in good shape. On the other hand, constructing an entirely new net is a craft that commands a considerable investment in time, patience, and diligent attention to work and detail.
 
New Net Construction
To start the first row of meshes, we size a loop to the desired web size and fasten it together with a bowline. Next hang the loop on a nail and align the knot mid-way on the left side of the mesh.

Grab a small length of twine with the left small fingertip, then pierce the first mesh from under and behind with the twine-loaded shuttle. Size the second mesh accurately with the small finger and grasp the first mesh tip with left thumb and index finger. Tie a snug mesh knot.

We’re now ready to sew our first row of web using the left-to-right sewing posture. At this point turn the two meshes over on the nail. In other words, we want the mesh knots continuously positioned on the left aide of the initial net row. This helps to prevent twist in the lay or hang of the net, and after a few meshes are established the lengthening work can be maneuvered back and forth to adjust the knot position.

Also it’s helpful to keep a firm downward pull on the web, an action which assists accurate mesh sizing, easy sewing, and tight knot tying. Later, after the desired net panel length has been accomplished, it’s time to start fashioning the net body.

To do this, you string the first row of meshes, every other loop, on a twin-bar tool or tightly stretched line. Then the sewing becomes both easier and faster as the left-to-right, right-to-left action rapidly forms the webbing.

To summarize this lesson, there’s the additional problem of reducing or adding meshes to form a desired taper. Then you must consider what kind of trap frame or ribline is necessary to sew the net selvage to. In simple terms a gill net has a head rope with spaced floats and a weighted lead line attached to the webbing, which completes this specific type of net-body framework.

All of these finishing steps have a particular technique to apply toward the end result, a beautifully crafted foraging tool. All these net crafting problems are fully covered in the resource listed earlier in this article.
 
Net crafting, net hanging, and net repair are all connected but different skills. I've fished nets up to half a mile long so those were all machine made. We did hang those nets. This means we attached the nets to the lead line at the bottom and the cork line at the top. We also sewed the multiple rows of net together to get the desired depth. Dad used to hang the best nets there were. His nets would out fish any others.

Patching nets is a bit of an art. I learned to not patch all the holes in a gill net. If you left a small hole a fish would find its way through and several others would hit the area around the hole and get caught.
 
Being land locked ocean netting is a reach for me. There are rivers around here where large nets could be used but for submerged logs floating downstream that would wreak havoc on such. So, trot lining is the art every boy learns in these parts.

That said nets for emptying ponds etc are handy. Years ago I bought a simple little book. It is by no means a netting encyclopedia but covers the basics of small nets, like cast nets but includes others.

Author Ted Dahlem Title “How to make and mend cast nets” Its still available for around $6.

The book has instructions for a couple of small projects like making a hammock. I made one and gave it to a friend (I’m not fond of hammocks). It turned out okay.

I keep a set of shuttles in my fishing gear and a large spool twine. I also keep a 1000ft spool of 550 cord around. Handy if I have to make a net. Oh, a set of shuttles are around $10 and can be ordered from lots of places.
 
20190913_162210.jpg
20190913_162011.jpg
20190913_162052.jpg
View attachment 24424
 
Hey @Just Cliff Great minds think alike... not only do you have my book you have the same set of shuttles I do! I stopped and bundled up my gear after making the hammock... Did you take it a lot further?

Story to share... as a kid on vacation... Fair Hope AL... Early one morning my dad and I watched a guy with a cast net doing his thing by the city pier... After a while he caught something, a 3ft sand shark. He got his net back... or at least parts of it... :D:D:D:D He was one angry dude! That shark chewed his net to pieces!

I need to make a cast net... my next project.
 
Last edited:
Hey @Just Cliff Great minds think alike... not only do you have my book you have the same set of shuttles I do! I stopped and bundled up my gear after making the hammock... Did you take it a lot further?

Story to share... as a kid on vacation... Fair Hope AL... Early one morning my dad and I watched a guy with a cast net doing his thing... After a while he caught something, a 3ft sand shark. He got his net back... or at least parts of it... :D:D:D:D He was one angry dude! That shark chewed his net to pieces!

I need to make a cast net... my next project.
I did but can not find the pictures. (Nasty computer crash a while back. My posts have been limited some what because I cant find all my stuff.)
It's not too difficult once you get the hang of it. I may pick it up again seeing as i'm not what I once was.
 
We were fishing one day with our half a mile long seine net when a whale blew inside our net. You set the net in basic a flat U shape so the fish don't swim around the net. We waited for it to hit as there was nothing else we could do. In a couple of minutes it reappeared on the other side of the net. It had detected our net and gone under it. That could have ended our season as ordering new net and hanging it would have taken too long.

Another day we caught a baby seal. We rapidly brought the net aboard and we were successful at getting the baby back to mother alive. It cost me a set of rain pants. The ungrateful little whelp. Wild critters don't understand that you are trying to help.
 
I stopped at a pawn shop on the local reservation. I was surprised to see an entire wall with gill nets for sell.
Then I thought about it and it became clear.
Indians, nets, not fishing season, no beer money so pawn the nets. I didn't even look for a price because they had a sign that said "for sell to treaty fishermen only."
I knew a lobsterman in Maine that made his traps and his wife made the netting all from scratch. They were a work of art and he used them daily.
He tried to give me one but I had no way to get it from Maine to Seattle.
 
When I was a boy I would go out with a saning net to collect minnows that my Dad would use to catch bigger fish. I remember catching a sun fish and thinking it was the coolest thing. I also remember how easy it was to grab up a bunch of little perch, bullheads, crawdads, etc. in one swoop. Not that I wanted to eat any of those disgusting things. ;)
 
Good videos @elkhound I happened to be up early enough this morning to watch them without it counting against my metered internet.

Last week I ordered a 550ft roll of #36 twine... its been a few years. I could stand a refresher course. I'm thinking of making a small cast net this winter. A nice "sit around the fire project" for cold winter days.
 
@Peanut yes i will try to make a net this winter. i had been thinking of doing this anyways as a skils challenge to others here that are interested in net making. i think i will make a small gillnet say 6ft by 3ft deep. not sure if i will use scrounged materials or new stuff or a blend of both.
 
Monkey see, monkey do! I think I will make a net too! It's something that I have been wanting to do for a long time. (Hopefully, my winter will be uneventful enough to allow me to carve out the time.)

Of course, a net can have multipurpose uses and can be equally useful on land and water.

Here are just a few ideas for using a net outside of water:

"...Splayed over a rabbit hole, predatory animals, such as the ferret or snake were inserted into a second hole, or a fire was built just outside the den, and as the rabbit attempted to make its escape, it found itself tangled in the net. In modern terms, it is a very humane way to catch an animal and provides the most calories for the least amount of work.

The net was equally useful for birds. Strung out over a V shaped stick, it allowed the hunter the reach to catch birds mid flight, and again was very humane and calorically beneficial.

Most of all, it provided a convenient way of transporting large amounts of gathered material. It was a backpack, a hand bag, a shopping bag etc, all rolled into one."

(https://www.instructables.com/id/Primitive-Net-Making-From-Carving-Your-Needle-To-W/)
 
you might want to look into a rabbit purse net.it goes over holes and when rabbit or other critter bolts from hole it closes down on itself and critter is caught. its like a castnet basically. i have seen video in u.k. of netting across fields catching bolting rabbits.they have loose poles holding it in place and it falls over easy catching rabbit in it as folds down on it. i have seen them jump it too...lol


purse-net3.jpg


in_the_net.jpg
 
Last edited:
WOW!!!!! I am so thrilled with this thread, I don't know how to act!

I feel a lot like a stupid squirrel running back and forth on a road, unable to make up its mind which way to go. In this case, which of the videos on the thread to watch first! I will eventually do all of them.
 

Latest posts

Back
Top