Wiring help please

Homesteading & Country Living Forum

Help Support Homesteading & Country Living Forum:

This site may earn a commission from merchant affiliate links, including eBay, Amazon, and others.

LadyLocust

Awesome Friend
Neighbor
HCL Supporter
Joined
Mar 5, 2019
Messages
13,686
Location
Washington
I am trying to replace the marker lights on my old trailer. Hubby did one this way last year.
IMG_4583.jpg

It works fine. I went and picked up a pkg. of the little blue connectors, but have no idea where he found that itty bitty screw to go through the eye. The lights don't come with those and I'm thinking there must be a different (proper) way. Here's what I have:
IMG_4585.jpg

Can anyone explain so it will work and be safe?
Thanks in advance.
 
They do make crimp terminals for a type of tab but it doesn’t look like what you have, at least from that angle. The only other option I can see is to clean a spot with either a scotch-brite pad or steel-wool and solder the wire directly to it. Flux paste would help it adhere easier.
Thank you! I have some of the crimpers but those are for that little tab thing. I figured there must be a proper way for these things. I should just plan on jimmy-rigging things then be surprised when I don't have to 🤪
 
I don't think the wire is attached to the screw hole.
I think the wire is attached to the trailer wiring. If it was supposed to be attached with a screw the factory would have done that.
Pull the wire back out and connect it to the incoming wire with either a crimp connector or better yet solder it.
My guess is your husband just connected the trailer wire to the light because it was easy to do.
There is no wire on the light anywhere. The wire shown is what will come from the trailer. It's a 1968 trailer so the lights aren't like the easy ones with the little wire pre-soldered right to the light. There are YT videos how to change the bulb :rolleyes: but not how to wire them. I know it shouldn't be difficult . . .

Thanks @dademoss Hope you get some shut-eye.
 
1
Duplicate what hubby did. Find the same hardware.

2
Solder the wire as suggested previously.

3
Conductive silver epoxy the wire in place.

Electrically Conductive Wire Glue Amazon.com: Electrically Conductive Wire Glue : Tools & Home Improvement

Which ever way you choose the fixture must be mounted to a metal body/frame to provide a good ground/return path.

Ben
 
There is no wire on the light anywhere. The wire shown is what will come from the trailer. It's a 1968 trailer so the lights aren't like the easy ones with the little wire pre-soldered right to the light. There are YT videos how to change the bulb :rolleyes: but not how to wire them. I know it shouldn't be difficult . . .

Thanks @dademoss Hope you get some shut-eye.
The screw should have been included in that case.
Sounds like a trip to Ace hardware is needed.
 
I did, but no solution other than those mentioned came to mind :(

It's the old, "if it was here, it's done 5 minutes", but I have cans of misc screws, bolts, nuts, both SAE and metric.

What I did with my old trailer was strip off all the incadescent lights, and replace them with LED lights.
 
Wonder around your shed and find an old wall outlet, It should have a screw in the side of it.see if it fits your application

Here is a tip. Every time you go to town, buy 5 or 10 bucks worth assorted screws, nuts , bolts and store them by size in used glass jars

Now when you do stuff around the house you will have what you need when you need it
We have that collection and I'm to the point of pitching them all 😂 The problem is no system in place to keep them organized so they end up mixed up and in various containers. Makes me walk with a twitch! At work I just went through and put all the fasteners in like containers etc. There is one Misc. bucket sitting on top and I told the guys it costs a quarter to put a piece in there. I will probably go pick up a pkg of small screws.
 
Crimp the hot wire and slide it under one of the 4 tabs on the right of that light to lock it in place. The second screw hole is buried behind the wire in the pic, and the screw hole on the left is to also be used as a ground wire, and is why it is over the brass plate.

1653843022711.png
 
there must be a different (proper) way. Here's what I have:
IMG_4585.jpg

Can anyone explain so it will work and be safe?

Lady L,
Take your light to the hardware store to find a screw. You can either find a short sheet metal screw that will cut threads into the hole or you can find a screw with a nut that will go through the hole. Get a washer at the same time.
I would find one that goes through the hole and put it on through the back so the threads stick out the front. Crimp your ring connector (the blue plastic wire end) on the wire securely and slip it over the screw. Place the washer on and then tighten the nut while holding the screw from the back. Once the nut is tight you can cut the screw just above the nut so it is not in the way of the cover.
 
Are there holes in the plastic where I put the arrows? If so then it is made to just shove the wire into the hole and spring tab will hold it and make the connection.
View attachment 87157
Ah ha! I think you are on to something! There are two wires from the trailer that I was (because that's how I found them) nutting together to run one wire to the light. There are holes behind each one of those prongs you arrowed. Me thinks one for each of the wires so it continues the circuit. That makes sense!!!
I has been pouring down rain all day and working on electrical in the rain isn't my favorite so I didn't. I will give that a whirl in the morning. Thank you again.
I knew there had to be a way these were intended to be used.
 
I am trying to replace the marker lights on my old trailer. Hubby did one this way last year.
View attachment 87089
It works fine. I went and picked up a pkg. of the little blue connectors, but have no idea where he found that itty bitty screw to go through the eye. The lights don't come with those and I'm thinking there must be a different (proper) way. Here's what I have:
View attachment 87092
Can anyone explain so it will work and be safe?
Thanks in advance.
It looks like one of those crazy screws they use in mobile homes to keep electricians in business, any hardware store should sell replacements.
 
They do make crimp terminals for a type of tab but it doesn’t look like what you have, at least from that angle. The only other option I can see is to clean a spot with either a scotch-brite pad or steel-wool and solder the wire directly to it. Flux paste would help it adhere easier.
It will melt the plastic frame. Take the part to a hardware store & someone will help you find the right screws.
I have done it for men & women in stores, where I never worked.
 
Mark a calendar with a red x on a Saturday
scrounge up a bunch of glass jars with lids, think mason jars
find a shelf in your work area. screw the lid of the jar under a shelf
then screw the jar into the lid
put diff screws in diff jars

lol my junk drawer

junk_drawer.png
 
WARNING, not safe for OCD individuals!!!

View attachment 87129

There are also carefully sorted bins, compartment boxes, etc, but really, those are no fun :p
I gotta know. Are you like me, when looking for a certain screw you say to your self. If their is one their has to be two, If I have two then i know i have three and thats all i need
 
Mark a calendar with a red x on a Saturday
scrounge up a bunch of glass jars with lids, think mason jars
find a shelf in your work area. screw the lid of the jar under a shelf
then screw the jar into the lid
put diff screws in diff jars

lol my junk drawer

View attachment 87173
You need more junk, I can still see the bottom of the drawer.
 
I have worked doing repair work on various things. To make it easier i have slowly acquired a large assortment of the small compartmentalized plastic boxes that harbor freight sells that each have the same type of stuff in them. Bolts , screws snap rings, shrink tubing etc etc. Usually less than ten bucks and very handy. Not the best quality but good enough. For the coming shortages I recently went and picked up a complete assortment of the boxes to stash away....welcome to the apocoliptic hardware store....repairs done for food and or fuel.
 
DW will not give up a drawer, my screws, nuts, washers are in my tower toolbox drawers.
I save all these when I throw out junk & I buy at least four if I need one.
Someone will need it sometime, somewhere.
 
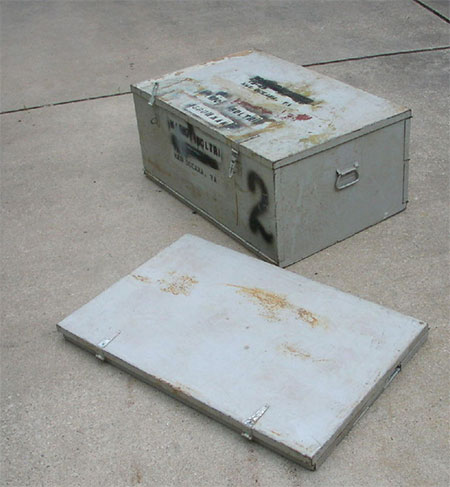
We had a cruise box full of hardware. It must have weighed over 200 pounds.
You could dig through it and find just about anything you need but it might take you two days.
Our shop Chief made us get rid of it because he thought that we needed to order hardware so the Navy would have real data of what we used. That was a stupid. Getting the Navy to improve anything would take years and cost millions.
060116-cruisebox.jpg
 
Mark a calendar with a red x on a Saturday
scrounge up a bunch of glass jars with lids, think mason jars
find a shelf in your work area. screw the lid of the jar under a shelf
then screw the jar into the lid
put diff screws in diff jars

lol my junk drawer

View attachment 87173
Yes sort everything into jars! Then mount the jars on the ceiling and label them. Like this....................
7-22- 027.JPG
 

Latest posts

Back
Top